
WordPress 5.5 설치
cd make all install clean
make config
make all install clean
어쩌다보니 현재 직지서버는 개인적인 것과 원래 직지프로젝트 관련한 것들 포함해서 몇 개의 워드프레스가 돌아간다. 따라서 다수의 워드프레스 누리집을 돌리기 위한 설정을 해 줘야 하는데, 이건 설치한 후에 그 디렉토리를 다른 장소로 복사하는 것으로 시작한다.
site1/wp-config.php 설정
cp -Rp /usr/local/www/wordpress /other_directory/site1
그리고 설정 문서 만들어 용도에 맞게 설정하기.
cd /other_directory/site1
cp -Rp wp-config-sample.php wp-config.php
wp-config.php 에서 다음 내용을 확인
// ** MySQL settings - You can get this info from your web host ** //
/** The name of the database for WordPress */
define('DB_NAME', 'wp_site1');

/** MySQL database username */
define('DB_USER', 'wp_site1');

/** MySQL database password */
define('DB_PASSWORD', 'mytopsecret1');

/** MySQL hostname */
define('DB_HOST', 'localhost');

/** Database Charset to use in creating database tables. */
define('DB_CHARSET', 'utf8');

/**
 * 워드프레스 데이타베이스 문서 전치어.
 *
 * 아래 예를 든 대로 'wp_'를 사용하면 여러 워드프레스 사이트를 하나의 DB 처럼 관련할 수 있다.
 * 이름은 당연히 숫자, 글자, 그리고 밑줄(_)로만 구성되어 있어야 한다.
 */
$table_prefix  = 'wp_';
MySQL 자료광 설치
자료광은 Database를 나름 우리말로 풀어 써본 것으로, 이제 워드프레스를 사이트를 담아낼 자료광을 만들어 준다. 여기에서 보여주는 설치 순서, 즉 MySQL 자료광을 만들고, Apache 서버를 설정하고, 해당 서비스를 제공하는 가상서버에 접속하여 설정을 한 다음에, 보안 서버 인증을 받아 보안 서버로 변경 하는 것은 요즘 많은 패키지들을 설치하는 데 공통으로 쓰인다.
wp_site1 자료광 만들기
mysql -u root -p
[(none)] create database wp_site1;
[(none)] use mysql;
[mysql] create user 'wp_site1'@'localhost' identified by 'mytopsecret1';
[myql] grant all privileges on wp_site1.* to 'wp_site1'@'localhost';
[mysql] flush privileges;
[mysql] exit
Apache 가상 서버 설정
httpd.conf 에 가상서버 설정을 더해주기
/usr/local/etc/apache24/httpd.conf 제일 마지막 부분에 다음 사항을 추가한다.
Include etc/apache24/vhosts/*.conf
/usr/local/etc/apache24/vhost 만들어주고, 그 안에 가상 서버 문서 설치
cd /usr/local/etc/apache24/
mkdir vhosts
cd vhosts
vi site1.conf
site1.conf 설정하기
이 일을 시작하기 전에 funio.com 에서 site1 을 A domain 으로 더했다.
#####
# site1.my.domain;
<VirtualHost *:80>
#    ServerName site1.my.domain
#    Redirect / https://site1.my.domain/
#</VirtualHost>

#<VirtualHost *:443>
    ServerAdmin webmaster@my.site
    DocumentRoot "/other_directory/site1"
    ServerName site1.my.domain

#    SSLEngine On
#    SSLCertificateFile "/usr/local/etc/letsencrypt/live/site1.my.domain/cert.pem"
#    SSLCertificateKeyFile "/usr/local/etc/letsencrypt/live/site1.my.domain/privkey.pem"
#    SSLCertificateChainFile "/usr/local/etc/letsencrypt/live/site1.my.domain/fullchain.pem"

    <Directory "/other_directory/site1">
        Options -Indexes +FollowSymLinks
        AllowOverride None
        Require all granted
	<IfModule mod_rewrite.c>
	    RewriteEngine On
	    RewriteBase /
	    RewriteRule ^index\.php$ - [L]
	    RewriteCond %{REQUEST_FILENAME} !-f
	    RewriteCond %{REQUEST_FILENAME} !-d
	    RewriteRule ^(.*)$ /index.php/$1 [L]
	</IfModule>
	<IfModule mod_url.c>
	    CheckURL on
    	    ServerEncoding UTF-8
	</IfModule>
    </Directory>
</VirtualHost>
이제 아파치를 재기동 한다.
apachectl restart
http://site1.my.domain 접속해서 워드프레스 설치
이건 화면에서 보이는대로 따라하면 된다는^^.
https://site1.my.domain 설정
워드프레스 설치가 끝났으면 다음 명령을 실행해서 새로 만든 사이트를 보안접속할 수 있게 해줄 인증문서를 만든다.
certbot certonly --webroot -w /other_directory/site1 -d site1.my.domain
성공적으로 실행이 되었으면 Apache 서버 설정 문서를 다시변경한다. 기본적으로 위 설정문서에서 주석처리 했던 부분을 다시 살려 주는 거다.
https를 위해 site1.conf 새로 설정하기
#####
# site1.my.domain;
<VirtualHost *:80>
    ServerName site1.my.domain
    Redirect / https://site1.my.domain/
</VirtualHost>

<VirtualHost *:443>
    ServerAdmin webmaster@my.site
    DocumentRoot "/other_directory/site1"
    ServerName site1.my.domain

    SSLEngine On
    SSLCertificateFile "/usr/local/etc/letsencrypt/live/site1.my.domain/cert.pem"
    SSLCertificateKeyFile "/usr/local/etc/letsencrypt/live/site1.my.domain/privkey.pem"
    SSLCertificateChainFile "/usr/local/etc/letsencrypt/live/site1.my.domain/fullchain.pem"

    <Directory "/other_directory/site1">
        Options -Indexes +FollowSymLinks
        AllowOverride None
        Require all granted
	<IfModule mod_rewrite.c>
	    RewriteEngine On
	    RewriteBase /
	    RewriteRule ^index\.php$ - [L]
	    RewriteCond %{REQUEST_FILENAME} !-f
	    RewriteCond %{REQUEST_FILENAME} !-d
	    RewriteRule ^(.*)$ /index.php/$1 [L]
	</IfModule>
	<IfModule mod_url.c>
	    CheckURL on
    	    ServerEncoding UTF-8
	</IfModule>
    </Directory>
</VirtualHost>
Apache를 재기동 한다.
apachectl restart
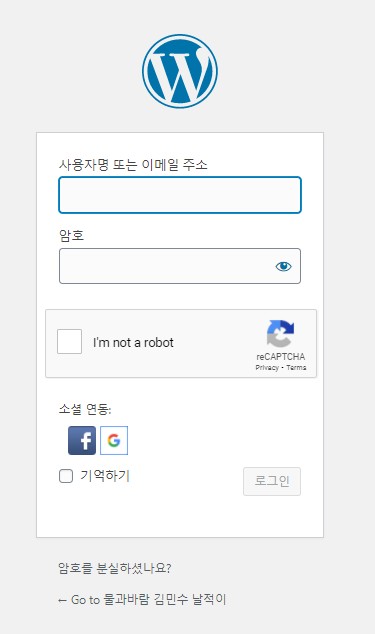
이제 https://site1.my.domain에 접속해서 새로 만들어진 워드프레스 누리집을 즐긴다. 아래 접속 화면은 직지지기 날적이(일기장) 워드프레스 초기 화면인데, 워드프레스 자체도 여러가지 플러그인 설정을 해주어야 하는데, 이건 사용자가 자신이 원하는 것을 하나씩 배워나가면서 설치하는 게 어떨가 싶다.
;#;
 ;#;
;#;